APPLE PIE CHEESECAKE FOR TWO

This is a wonderful (and super easy) dessert to top off that romantic Valentine dinner for two (and you can make it all ahead of time!!).  It is a creamy cheesecake, topped with a warm apple pie filling and cold whipped cream........best of the best!!


Preheat your oven to 325°F, and line a mini-loaf pan (6"x3"x2") with foil, then lightly spray the foil with cooking spray.

CRUST
1/4  cup graham cracker crumbs
2    teaspoons sugar
2    teaspoons melted butter
1    tablespoon chopped pecans
pinch of cinnamon

Mix well and press into the bottom of your prepared mini-loaf pan.

CHEESECAKE FILLING
4 ounces cream cheese at room temperature
3 tablespoons sugar
1/2 teaspoon vanilla extract
2 teaspoons flour
1 large egg white

Beat the cream cheese, sugar and vanilla until very smooth; mix in the flour and egg white and beat just until smooth (takes just a second).

Spread the filling, evenly, over the crumb crust. Set the mini loaf pan inside an 8" or 9" cake pan and fill the bigger pan with some HOT water (hot water should be about 1" deep). Bake 28-33 minutes (my electric oven takes exactly 33 minutes). The cheesecake should be just "set" and barely jiggle when you tap on the side of the loaf pan.

Remove from oven and let it sit at room temperature for about 30 minutes, then chill in the fridge for at least 2 or 3 hours (or overnight).

APPLE PIE TOPPING
This topping should be put on the cheesecake just before serving. You can serve it warm (which is how we like it) or cold.


  • 2 large sweet apples (see note)
  • 1 tablespoon butter
  • 1 teaspoon water
  • 1/2 cup sugar
  • 1/4 cup brown sugar
  • 1/4 cup chopped pecans
  • 1/4 teaspoon cinnamon
  • pinch of nutmeg


Melt butter and water in a medium saucepan and then add everything else. Saute on low heat for about 5-8 minutes or until apples are tender. Thicken the sauce with a slurry of 1/2 teaspoon of cornstarch and 1 teaspoon of water.  Remove from heat and stir in 1/4 teaspoon of vanilla.

You can use this topping after it cools down a little, or if you want to serve it cold, just store it in the fridge.

When it's time to serve, grab the ends of the foil in the mini-loaf pan and lift the cheesecake out.  Cut the cheesecake in half and place on dessert dishes; top each one with a large serving of apple pie filling (warm or cold). Top with sweetened whipped cream.


Apple Snacking Cake Recipe

Apple Snacking Cake Recipe  - This old fashioned, super moist, snack cake is quick, easy and only takes ONE apple!! It is the PERFECT snacking cake and goes wonderfully in a lunch box.


Apple Snacking Cake Recipe  

  • 1/3 cup brown sugar lightly packed
  • 1 teaspoon ground cinnamon
  • 2/3 cup white sugar
  • 1/2 cup butter (room temperature)
  • 2 eggs
  • 1  1/2 teaspoons vanilla extract
  • 1  1/2 cups flour
  • 1  3/4 teaspoons baking powder
  • 1/2 cup milk
  • 1 large apple


Preheat oven to 350°F and grease and flour a 9"x5" loaf pan.

Core and peel the apple then pulse it in the food processor a few times until the pieces are about the size of a green pea.

Mix brown sugar and cinnamon together and set aside. 

Beat white sugar and butter together until smooth and creamy; beat in eggs, one at a time; add vanilla, flour and baking powder and beat until smooth, then stir in the milk and chopped apples, until the batter is well mixed.

Place 1/3 of the batter in the loaf pan and top with 1/3 of the sugar-cinnamon mixture; do that two more times, ending with sugar cinnamon.

Bake at 350°F for 30-40 minutes (my electric oven takes 40 minutes) or until toothpick tests clean.


Let cake cool in pan for about 10 minutes, then turn it out on a rack to cool.

This snacking cake definitely does NOT need any frosting, ENJOY!!


Homemade Chocolate Pudding

Homemade Chocolate Pudding - I admit I have posted a lot of pudding recipes, but then again, I have tried many, many more pudding recipes than I have posted, so I've tried to hold back and post only the best ones...........Oh who am I kidding, WE LOVE PUDDING!!

With that said, today's chocolate pudding is BY FAR THE BEST ONE YET. It has a silky smooth mouth feel (important in pudding), a wonderfully deep milk chocolate flavor and it has a wonderful consistency.........it is REALLY good.


Homemade Chocolate Pudding

3 (slightly heaping) tablespoons bakers cocoa powder
1/2 cup heavy cream
2 1/4 cups whole milk
1/2 cup brown sugar
3 egg YOLKS
2 level tablespoons corn starch
2/3 cup milk chocolate chips
5 tablespoons butter (cut into pieces)
1 1/2 teaspoons vanilla

Whisk the cocoa, brown sugar and corn starch together and set aside.

Whisk the cream, milk and yolks together in a saucepan that has a nice heavy bottom (it prevents scorching). Add the dry mixture to the wet mixture and whisk until smooth. Make sure you scrape the corners of the pan because the corn starch likes to "hide" there.

Cook on medium heat (stirring) until it gets thick and starts to bubble all over the entire surface of the pudding. TURN THE HEAT DOWN to a level where it still bubbles (but isn't going crazy) and cook/stir for another 30 seconds.

Remove from heat and add the butter, milk chocolate chips and vanilla; whisk until melted and smooth. Now, if you REALLY want that super smooth and silky mouth feel, pour the cooked pudding through a mesh strainer, it really makes a difference but isn't absolutely necessary.

Pour into dessert dishes and lay a piece of waxed paper or plastic wrap right on the surface of the hot pudding (this will stop any "pudding skin" from forming). Chill for at least 4 hours.


NOTE: The quality of your milk chocolate chips makes a difference; make sure they are real chocolate, not imitation.

NOTE: Make sure you use unsweetened baking cocoa.

FRESH PINEAPPLE UPSIDE-DOWN CAKE

FRESH PINEAPPLE UPSIDE-DOWN CAKEI'm not sure WHY I've never thought of making a pineapple upside-down cake with FRESH pineapple before. Maybe it is because ALL of my cookbooks suggest canned pineapple? Maybe it is because canned pineapple is always in the pantry? Maybe it is because I'm not very adventurous? Well, this cake came about due to the rare combination of... "I want to bake something" + "what can I do with this very ripe pineapple?" + "the perfect window of time". 

The end result was this pineapple upside-down cake made with FRESH pineapple and it was delicious!! The difference is like night and day!!


Preheat your oven to 350 and cut a parchment paper liner for the bottom of a 9" round cake pan. Spray the pan and parchment paper with a light coating of cooking spray. The parchment paper is not absolutely necessary, but it helps if you have a "sticking" issue with the sweet pineapple glaze (you can use waxed paper in a pinch).


  • 5 tablespoons of melted butter
  • 2/3 cup brown sugar (packed)
  • 3 cups fresh pineapple cut into 1" cubes (see note)
  • maraschino cherries cut in half
  • 1 1/2 cups all purpose flour
  • 1 1/2 teaspoons baking powder
  • 1/2 teaspoon salt
  • 1/2 teaspoon cinnamon
  • 1/2 cup butter (room temperature)
  • 2/3 cup white sugar
  • 2 eggs
  • 3/4 cup pineapple juice (or milk)
  • 1 teaspoon vanilla
  • 1 teaspoon butter extract
  • 1/2 cup pecans chopped medium-small


Mix melted butter with brown sugar and spread evenly in prepared 9" round cake pan. Set aside.

Cut pineapple into 1" chunks and blot them dry between several thicknesses of paper towel (press on them a little to extract excess juice).

For the batter, cream the butter and sugar until it is really fluffy. Under-beating the butter at this stage will give you a poor quality cake. When it is nice and fluffy, add the eggs (one at a time) and extracts and beat until its fluffy again.

Sift the flour, baking powder and cinnamon into a bowl. Add the flour mixture to the butter mixture in three parts, alternately with the pineapple juice (or milk) starting and ending with the flour. Set aside.

Assembly: Nestle the pineapple, pecans and cherry pieces down into the brown sugar mixture in the cake pan (arrange in pretty fashion because this will show). Pour the cake batter over the top and very gently spread it out.

Bake in 350 oven for 45 to 55 minutes or until a toothpick tests clean (my oven takes exactly 45 minutes). Remove from oven and sit pan on a cooling rack for 15 minutes. After 15 minutes, run a thin bladed knife around the edge of the cake and invert onto a serving plate and peel off the parchment paper. Serve cake warm or at room temperature.

NOTE: Traditionally, pineapple upside-down cake has pretty rings of pineapple with red cherries in the center of each ring. However, when the cake is baked like that, it is hard to eat. You either get a big unmanageable hunk of pineapple on your piece of cake or no pineapple at all (does that make sense?). Instead, I cut the pineapple into very small pieces (almost a dice) and arrange the cherries randomly over the cake. It is much easier to cut, serve and eat (even if it ISN'T traditional). If you use this diced pineapple style, it only takes two cups of diced fruit instead of three.

PIZZA CHICKEN

PIZZA CHICKENThis is the time of year that I get into a menu rut pothole and start pulling out my old cookbooks in search of new ideas on how to use that big bag of frozen chicken breasts in the freezer. Yes, friends, I have spring fever!!

I came up with this recipe a few years ago and it is not only super easy, but a quick and tasty week night recipe.


Pound four or five boneless-skinless chicken breasts out a little. How thin you get them isn't really crucial, but just try and make them an even thickness (so the whole breast cooks evenly).
Salt and pepper the chicken meat and dust them with flour and fry them in a little butter until 99% done and then let them rest on some paper towels while you make the sauce.
In a saucepan, whisk the following until smooth:

INGREDIENT 

  • (1) 6 ounce can of tomato paste
  • 1 + 1/2 cans of water
  • 2 teaspoons of dry onion flakes (or equal fresh)
  • 1/2 teaspoon salt
  • 1/4 teaspoon pepper
  • 1 teaspoon dry oregano
  • 1 teaspoon dry basil
  • 1/2 teaspoon fennel seed
  • 1 teaspoon sugar
  • 1/4 to 1/2 teaspoon red pepper flakes
  • 2 tablespoons butter
Simmer slowly until the sauce thickens up (takes about 2 or 3 minutes).
Placed browned chicken breasts on a rimmed baking pan and top with a nice THICK layer of pizza sauce, then top with shredded mozzarella or provolone cheese and any veggies (if you want them). Just make sure the veggies are cooked.

Bake them until the meat is hot and the cheese is melted...quick and easy!!  You can also cut the raw chicken breast meat into kid size portions or even "nugget" size portions.


CHEESECAKE BROWNIE CUPCAKES

CHEESECAKE BROWNIE CUPCAKESThis recipe is a delightful combination of a brownie layer baked under a vanilla cheesecake layer; do I have your attention yet? 

They are delicious and seriously going onto my holiday dessert tray this year. If you like chocolate (duh!!) AND you like cheesecake (double duh!!) you will love these quick and simple treats.


Brownie Layer
1 ounce semi-sweet chocolate
1/4 cup butter
1 tablespoon cocoa powder
1/2 cup sugar
pinch salt
1 large egg
1 teaspoon vanilla
1/3 cup flour

Heat chocolate, cocoa and butter (I use my microwave) just until melted, then stir well and set aside to cool while you do the next step.

In another medium size bowl mix sugar, egg and vanilla till smooth; add melted chocolate/butter and flour and stir just until it looks well mixed (I do this by hand - no mixer); set aside.

Cheesecake Layer
8 ounce cream cheese (room temperature)
1/3 cup sugar
1 large egg
1 teaspoon vanilla

Using electric mixer, beat the cream cheese until it is very smooth. Add the sugar, egg and vanilla and continue mixing until creamy smooth.

Preheat oven to 350°. Line cupcake pan with 12 foil liners. If you don't have foil liners, you can use paper liners, but you will have to mist them with a little vegetable spray.

Put a very lightly rounded tablespoon of brownie batter in each cupcake foil and roughly spread it around a little.

Top the brownie layer with the cheesecake mixture, dividing it equally between the 12 cupcakes.

Bake for 30 minutes.  Remove from oven but do not remove from the cupcake pan. Let them sit at room temperature for 30 minutes, then chill in fridge (still in pan) for several hours.


I topped these little gems with a ganache (but you don't have to).  To make that, I just mixed a large handful of chocolate chips with 1/4 cup very hot (but not boiling) heavy cream, stirring until thick and smooth.

These are also very pretty at holiday time, topped with cherry pie filling and a swirl of whipped cream; it's sort of an individual black forest cake idea.


MAPLE CANDIED BACON

MAPLE CANDIED BACON  -Now I know that bacon isn't on a lot of our low calorie diets, but once in a while, you just have to live a little!!

I've seen candied bacon recipes all over the Internet and often wondered what all the fuss was about, after all, what can be better than fried bacon? Well, I'm here to tell you that CANDIED BACON is the answer. Holy cow, this stuff is good!!


Some people are dicing it and putting it on top of maple frosted cupcakes, some people are dicing it and putting it into deviled eggs, and some people like me who shall remain nameless, just devour it right out of the warm pan!!  It's just THAT good!!

There's not much of a recipe, but there ARE several tips I can give you that will help a bit.

First of all, use a large cookie sheet that has a lip on it. Line it with foil (this will make clean up a breeze) and put an oven safe wire rack on the foil (make sure to spray both sides of the baking rack with cooking spray too...that will also help).


Now a word about which bacon to use. Quality thick sliced smoked bacon works best, but it takes a lot longer to cook. Regular thickness smoked bacon works well but you REALLY have to watch it like crazy so it doesn't burn.......it's your choice.  I think I like the thicker bacon better; I have had great success using apple wood smoked bacon.

Preheat your oven to 400° if you are using thick bacon and 375° if you are using regular thickness.

Mix 1/2 cup of REAL maple syrup and 1 teaspoon Dijon mustard. Place the raw bacon slices on the baking rack, making sure that the slices don't overlap. Baste the raw bacon liberally (on one side) with the syrup-mustard mixture. 

Bake thick bacon for 20 minutes and regular sliced bacon for 15 minutes. Remove from oven, flip the bacon over and baste the other side with the syrup-mustard mixture. Put back in oven and bake the thick slices for another 20 minutes and the regular slices for another 10 minutes.

CAUTION: If you use the regular sliced bacon, watch it very carefully the last few minutes, because it can burn quickly if you leave it in too long.


When you take it out of the oven (the last time), sprinkle it very lightly with black pepper and TAKE IT OFF OF THE BAKING RACK.

I cool mine on parchment paper for about 15 minutes; unless I'm eating it right away I turn it over to make sure it cools/dries evenly.

NOTE: When I am out of REAL maple syrup, I've tried this recipe using pancake syrup. It works ok too, but it burns easier and the real maple syrup tastes a LOT better.


BRANDY SNAPS

BRANDY SNAPSIf you want to impress your guests, make some of these Brandy Snaps for them. They look so elegant and they are definitely not something you see on every dessert tray.

A hard candy shell filled with sweetened whipped cream...do I have your attention yet?  Pretty fool proof if you follow my extra tips below printed in RED, AND you can make them days in advance and fill them just before your guests arrive. 


Brandy Snaps are basically a crisp, sweet, lacy, candy shell that you can fill with sweetened whipped cream or your favorite mousse.

They look very hard to make, but it is an illusion; they are pretty easy if you pay attention to the tips below in RED.

2 tablespoons sugar
2 tablespoons white corn syrup
1/4 cup butter  (I used only 3 tablespoons)
2 teaspoons brandy (or) 1 teaspoon vanilla (I used rum extract)
1/4 cup all purpose flour

Since this whole process goes VERY fast, it is best to have everything ready before you start cooking the above ingredients.

Preheat your oven to 350° and line a cookie sheet with parchment paper (important). These candy shells REALLY spread as they cook, so only plan on making six of them on each cookie sheet.

Mix the sugar, corn syrup and butter in a small saucepan. STIR over medium heat until the mixture is good and bubbling, then remove from heat and stir in the flour and flavoring.

Drop one measuring teaspoon (per candy shell) of the cooked mixture onto the parchment paper. This will spread out into a circle about 4" in diameter as it bakes for about 6 to 7 minutes, but watch them very carefully after six minutes, as they can go from caramel colored to DARK very fast. It sounds tricky, but it isn't.

My candy circles were fairly pale in color until they hit the 6 minute mark in my electric oven, but they were a beautiful light caramel color at 6 1/2 minutes.

When they have turned a nice light caramel color, remove from the oven and let them sit on the cookie sheet for about 30 seconds. If they look a little oily, LIGHTLY dab them with a paper towel.

Use a pointed knife and lift the edge of the candy circle up a little so that you can grab it with your fingers (be careful, this is VERY  hot). One at a time, quickly roll the candy circle around the handle of a wooden spoon (they will cool almost immediately and hold their shape).

Once you form it around the spoon handle, it will instantly be cool enough to slide the candy tube off of the handle, and it's done!! 

If the other candies get too "hard" to roll, put them back in the oven for 30 seconds or so (but that shouldn't be a problem, as they stay fairly pliable as long as they are on the hot cookie sheet), they only become rigid once they cool off.


I didn't use a spoon handle, I used some metal cannoli tubes I have and they worked perfectly (no need to grease the spoon handle).

Keep the cooled candy tubes in an air tight container until you are ready to serve them. Fill them with sweetened whipped cream (the candy tubes can be filled up to about an hour before serving).

Don't be scared off by any of my "warnings' about this recipe, it may sound complicated, but it really is pretty easy and I hope you try it.

NOTE: I substituted rum extract for the vanilla, the candy tasted like butterscotch. I think ANY extract would work.

NOTE: You don't have to fill these with whipped cream. Almost any mousse like whipped filling would work wonderfully.


PEANUT BUTTER COOKIES


PEANUT BUTTER COOKIES - This glass cookie jar has been on my kitchen counter for the last 20 years. At least 75% of that time, it had peanut butter cookies in it. Our standard comment (“the kids like peanut butter cookies”) was obviously just an excuse, because the kids are all grown (with families of their own) and the jar is STILL full of peanut butter cookies. Needless to say, I don’t even look the recipe up anymore…I think I could make these cookies in my sleep.

Preheat oven to 375° Bake on un-greased cookie sheet
In large mixing bowl with electric mixer, beat until smooth:

  • 1 cup butter flavored Crisco
  • 1 cup peanut butter
  • 2 eggs
  • 2 teaspoon vanilla
  • 1 cup white sugar
  • 1 cup brown sugar

Once the above mixture is smooth, add 2 ½ cups flour, 1½ teaspoons baking soda and ½ teaspoon salt. Mix well. Cookie dough should be moist and hold together easily when you squeeze a hand full. If it seems a little dry or crumbly, add a couple tablespoons of water.
Roll the dough into balls about the size of walnuts, and then roll the balls in granulated sugar. Place on UN-greased baking sheet and flatten with fork tines in criss-cross pattern. Bake for 10-12 minutes at 375°; cool on parchment paper.
NOTE: Cooking time depends on how large you make these cookies. Dough balls about the size of a walnut, bake for 11 minutes in my oven.
NOTE: The original recipe called for butter (instead of the Butter Flavored Crisco). The Butter Flavored Crisco makes a much lighter & crispier cookie than butter (and still provides the buttery taste).

DOUGHNUT MUFFINS

Last week, I was watching the cooking channel, and someone was raving about a bakery that sold donut muffins (a new one for me). A few days later, I bought a baking magazine and sure enough, there was a recipe for...doughnut muffins!! I don't need to be hit over the head THREE times in order to get the message...I needed to make doughnut muffins!! I'm very glad I did, they are delicious.

Light and tender, buttery and sweet, these muffins are more like a delicious cake doughnut than a heavy dense muffin. Another delightful thing about this recipe is that it makes four dozen muffins, AND you can keep this uncooked batter in the fridge for up to three days, which gives you plenty of time to bake them all off!!

DOUGHNUT MUFFINS

1½ cups unsalted butter, room temperature
1¾ cups white sugar
4 large eggs
6 cups all purpose flour
1 tablespoon +2 teaspoons baking powder
½ teaspoon baking soda
1¾ teaspoon salt
1 teaspoon ground nutmeg
1 + 2/3 cups milk
¼ cup buttermilk

Cream the butter and sugar in a large mixing bowl (stand mixer works best because it's a lot of batter). Beat in eggs, one at a time until well mixed.
.
Sift the dry ingredients together and set aside. Mix the milk and buttermilk together and set aside.
.
Mix the dry ingredients, into the butter-sugar mixture, alternatively with the milk mixture (add in thirds), mixing only until it is well mixed after each addition. Don't over mix.
.
Grease and flour standard size cupcake pans and fill them 2/3 full. Bake in a preheated 350F oven for 30 to 35 minutes or until they feel firm to the touch.
.
Remove the baked doughnut muffins from the pan and dip them (on all sides) in melted butter, then roll them in cinnamon sugar.
To make cinnamon sugar, just mix 2 cups of white granulated sugar with a tablespoon of ground cinnamon. If you are a BIG cinnamon fan, use two tablespoons. These muffins are extremely light and tender and taste like a very good cake doughnut.

ORANGE JELLY - A LITTLE BIT OF SUNSHINE FOR A WINTERS DAY

We woke up to 9 inches of fresh snow this morning and my hopes for an early spring flew out the window. This is the time of year that I get into a real cooking rut, so much so, that even my stock of homemade jam seems boring.
.
To combat that, every year about this time, I make a quick batch of this orange jelly for our morning toast. All it takes is 4 oranges, 2 lemons and some sugar, to make this delicious taste of summer...it is not a marmalade.

I still remember the first time I bought marmalade for my family...they hated it. Well, they hated the "chunks" (and so did I), although the jam in between the chunks was tasty (does that make sense?). That is when I decided to create an orange jam that had no chunks...this is it.

4 medium oranges
2 medium lemons
1/8 teaspoon baking soda
1½ cups water
5 cups granulated sugar
1 pouch Sure Jell liquid fruit pectin

Wash and dry the oranges and lemons. Using a very fine zester, remove the colored part of the fruit. Make sure you don't go deep into the fruit or you will get the white pith, which can be bitter. Set the zest aside.

Peel and cut up the oranges and lemons, then pulse them in the food processor until they look like this, then set them aside.

Put the orange and lemon zest into a heavy bottomed sauce pan and add 1½ cups of water and the baking soda. Bring to a boil over high heat, then turn it down to a simmer, cover and simmer (stirring occasionally) for 20 minutes.
.
After 20 minutes, add the chopped oranges and lemons and simmer for another 10 minutes.
.
Put the cooked fruit-zest mixture through a fine mesh strainer and measure off 3 cups of juice.
.
Place exactly 3 cups of strained juice into a large heavy bottomed saucepan and add the sugar. Bring mixture to a full rolling boil over high heat, stirring constantly. Stir in liquid pectin and return to a full rolling boil for exactly one minute, stirring constantly. Remove from heat and skim off any foam with a metal spoon.
..
Immediately pour into prepared jars, filling to within 1/8" of the top. Wipe jar rims and threads. Cover with 2-piece lids and screw bands on tightly. Process jars in a hot water bath for 10 minutes.

This jam is not only great for your morning toast, but it works excellently for glazing chicken.

NOTE: Because this is a citrus jam, it can take up to a week to full set, but it is SO worth the wait.

LEMON MERINGUE BITES

LEMON MERINGUE BITES - I am a new convert for the little pre-made phyllo cups made by Athens (found in the frozen foods section). I have found many sweet and savory uses for the little time savers.

These sweet little beauties went together in (literally) minutes, thanks to the phyllo cups.

This filling recipe will fill two packages of phyllo cups and since they are so small, they chill quickly and will be ready to serve in short order. Two packages sounds like a lot of lemon pies, but it really isn't (the filling recipe was originally for an 8" pie). Hubby ate four of these after a big meal, so keep that in mind.

2 packages of phyllo cups

LEMON FILLING
1 cup white sugar
¼ cup corn starch
1 cup water
2 egg yolks, slightly beaten
2 tablespoons butter
1/3 cup fresh lemon juice
½ teaspoon fresh lemon zest
2 drops yellow food color (optional)

MERINGUE TOPPING
2 egg whites
¼ teaspoon cream of tartar
¼ cup white sugar
½ teaspoon vanilla extract

For filling, mix sugar, cornstarch and water in a heavy bottomed sauce pan. Cook over medium heat, stirring constantly, until mixture thickens and comes to a boil; boil and stir for one minute. Stir half of this mixture into the beaten egg yolks (whisking like crazy to keep the mixture moving). After well mixed, pour the whole thing back into the original pan and boil (and stir) for one more minute. Remove from heat and stir in the lemon juice, lemon zest and butter. Spoon hot lemon mixture into phyllo cups.
For the meringue topping, beat (with electric mixer) the egg whites and cream of tartar until foamy then sprinkle in the sugar, a little at a time, while you are beating; add the vanilla and continue to beat until stiff peaks form when you lift the beaters out of the bowl.
Top the hot lemon filling with a spoonful of meringue. Bake in a 400F oven for about 10 minutes or until the meringue becomes golden and shiny (watch carefully). Cool on the counter until they are room temperature THEN put them in the fridge to chill.

NOTE: Be careful when you separate the eggs; even just a speck of yolk in the egg whites will stop them from whipping correctly. Also, make sure you do NOT whip the egg whites in anything plastic. Any traces of grease or oil in the bowl or on the beaters will stop your egg whites from whipping properly.
Thank you all for your well wishes, regarding our cat Tabitha. She is walking around today and even has found her kitty voice again!! Thanks to lots of "ear licks" from our dog Chloe, Tabitha is well on her way to a full recovery.

HUNGARIAN GOULASH + HOMEMADE PASTA


This is MY kind of comfort food…slow simmered beef until it is fork tender, in a rich, full-bodied gravy and served over homemade noodles; it does not get much better than that. If you make this on the stovetop, it is done in about 2½ hours, at most. If you cook it in the crockpot, it takes about 8 hours on low.

2 pounds of chuck roast
1 medium onion diced
1 clove garlic minced
2 tablespoons olive oil
2 ½ cups beef broth (not bullion)
¾ cup ketchup
2 tablespoons Worcestershire sauce
1 tablespoon packed brown sugar
2 teaspoons salt
2 teaspoons paprika (not the hot kind)
½ teaspoon dry mustard
healthy pinch of crushed red pepper flakes
½ teaspoon coarse ground black pepper

Trim all of the white fat parts from a 2 pound chuck roast and cut it into one inch cubes. Brown the meat, onion and garlic in the olive oil. Drain any excess fat.

Add the rest of the ingredients and heat to boiling. Stir well and reduce heat to a very gentle simmer. Cover and simmer until fork tender (about 1 ½ to 2 hours depending on how tough the meat is). While this is simmering, make the noodles.


PASTA FOR FOUR

I made the dough for this in my kitchen aid (with paddle attachment). I made this before I got my new pasta roller, so it is a little irregular, but it still tasted great.

2 eggs
2 cups all purpose flour
1 teaspoon salt
6 tablespoons water
2 tablespoons olive oil

I just put the wet ingredients in first, mixed for a couple seconds, then put in the dry ingredients and mixed until it turned into a nice soft dough. Depending on the moisture content of your flour, you might have to add or subtract a tablespoon of water to get the right consistency (so don’t add all of the water at once). Knead the dough by hand for five minutes (or by machine for 3 minutes).The dough should be smooth, elastic and a just a little tacky to the touch.

Wrap the dough in plastic and let it sit (at room temperature) for 20 minutes…this is the most important step. If you skip this step, the dough will not roll out right and will try to spring back on you. If you let it sit for 20 minutes, it will roll out much easier.

Flour your counter and roll the dough out as thin as you can get it (it is a very forgiving dough and will not crack or tear like piecrust). Keep in mind that when you cook the noodles, they expand, so whatever thickness you roll them out to…your final product will be almost twice as thick! Cut the noodles in thin strips and air dry for an hour or so (I dried my noodles on a baking rack).To cook, bring a big pot of salted water to a boil (I added a tablespoon olive oil to the water) and cook the pasta for about 4 minutes, stirring occasionally. When it starts to float, it is very close to being done; remove a piece and taste it for doneness.
BACK TO GOULASH

When the noodles are almost done, and the meat is ultra-tender, turn up the heat under the meat and thicken the sauce with a flour-water slurry (¼ cup water + 2 tablespoons flour shaken in a jar). Stir vigorously while adding the slurry to the sauce and cook until thick, remove from heat. Serve goulash over cooked noodles.
NOTE: The first hour that the goulash cooks, the aroma will be strong, but never fear…the second hour, something magical happens and it all mellows out and becomes delicious.

TACO FILLING

TACO FILLING - I often look at the packets of dry seasoning and gravy mixes, at the grocery store, and wonder what is in them besides the main ingredient which seems to be salt. I see young cooks buying packets of taco seasoning mix and I have to resist the urge to tell them “save your money…you probably have the necessary ingredients at home already!”

This is a good, basic, kid friendly recipe for beef taco filling because it is more flavorful than spicy; I’ve used this recipe for many years. If you like more “heat”, just add some (seeded and diced) jalapeรฑo peppers. Personally, I like more heat than my husband (who thinks black pepper is too spicy LOL), so instead of bumping up the seasoning in the whole recipe, I just add some pepperjack cheese to MY taco.


  • 1 pound lean ground beef
  • 2/3 cup chopped sweet onion
  • 3 teaspoons chili powder
  • 1 teaspoon ground cumin
  • 1/2 teaspoon oregano
  • 1 teaspoon salt
  • ½ teaspoon regular paprika (not the hot kind)
  • pinch garlic powder
  • pinch of dried red pepper flakes (or to taste)
  • ½ cup water
  • (1) 4 ounce can of Ortega chopped mild green chiles


Brown the ground beef and onions, then drain well. Return meat to pan and add everything else. Simmer for about 15 minutes, using your spatula to chop the burger into fine pieces as it cooks. The water will help disperse the seasonings and then it will cook away. Turn heat down and keep warm until ready to use.

NOTE: If have an unexpected guest or two, just add some refried beans to the meat and mix well.

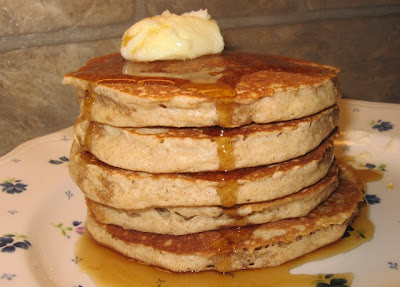
HONEY-WHOLE WHEAT-OATMEAL PANCAKES


These pancakes have a wonderful honey-whole wheat flavor that you are not going to get out of an instant "white bread" pancake mix. This batter mixes up in just a couple of minutes, using every day ingredients. I hope you try them.

HONEY-WHOLE WHEAT-OATMEAL PANCAKES

  • 1 egg
  • ½ cup whole wheat flour
  • ½ cup quick cooking oats
  • ¼ cup white flour
  • ¾ cup milk
  • 2 tablespoons vegetable oil
  • 1 tablespoon honey
  • 3 teaspoons baking powder
  • ½ teaspoon salt

In medium size bowl, whisk the egg until it is lemon colored & a little foamy; whisk in the milk, oil and honey (*see note). Add the flour, oats, baking powder and salt; whisk just until everything is well mixed (don‘t over whisk). Let batter sit for about 5 minutes before cooking.
NOTE: Use a scant 1/3 cup of batter for each pancake.
NOTE: The honey will want to “stay together” and sit on the bottom of your bowl, so make sure you completely mix it into the milk BEFORE you add the flour and oats (that way you won’t over mix the batter).
NOTE: I find that pancakes cook best on a pan that has been sprayed liberally with vegetable spray and then wiped out with a paper towel.
NOTE: You can add ½ cup raisins to this batter if you like raisins. Plump raisins by pouring a little boiling water over them in a small dish and let them sit for 15 minutes then drain well and add to batter.

MAPLE-WALNUT MINI MUFFINS

MAPLE-WALNUT MINI MUFFINS


The combination of maple and walnut just seem to go together in this sweet, moist mini-muffin. They are perfect with a hot cup of tea or if you are on the go. The muffins have a sweet maple syrup glaze on the top.
1 cup light brown sugar
½ cup flour
2 eggs
2/3 cup soft butter
½ teaspoon vanilla
½ teaspoon maple extract
1 cup chopped walnuts
Preheat oven to 350°. Grease and flour a mini muffin pan (or spray with a cooking spray that has flour, like Bakers Joy). Mix the wet ingredients in a medium size bowl and then stir in the dry ingredients, its just that simple. Mix long enough to just get the batter smooth. Make sure you use the MINI muffin pans (not cupcake size). Fill cups with one tablespoon batter each (makes 24). Top each one with a piece of walnut. Bake for 17 minutes.

NOTE: Dusting pan with flour is important.
NOTE: My oven cooked these little gems in 16 minutes
NOTE: Let these muffins cool for five minutes, then use a thin bladed knife to help you gently lift the muffins out onto a cooling rack. Don’t let these cool in the pan because they won’t come out.
NOTE: If you keep these muffins covered, they will stay soft. If you like a more chewy cookie type muffin, don’t cover them.
NOTE: Glaze the tops of the cooled muffins with the following mixture: ¼ cup real maple syrup + 1 tablespoon corn syrup boiled together for about 30 seconds.

BACON WRAPPED SHRIMP


Your guests will never guess how simple these shrimp are to make and YOU will be amazed how quickly they disappear; they are an absolutely delicious hors d’oeuvre.

(1) 16 ounce bag of frozen 16-20 count RAW shrimp (see note)
1 pound of smoked bacon (not the thick kind)
1 cup of your favorite barbeque sauce

In our Fred Meyer store, these shrimp are sold frozen (near the meat case). The one pound package says they are 16-20 count “Wild Caught” with shell on and heads off. Let them thaw in your fridge overnight. The next day, remove the shell (leave tails on). With a small sharp knife, make a shallow cut down the back of the shrimp and rinse out any “vein” you see there. Drain the shrimp on a paper towel and sit in fridge for a few minutes while you prepare the bacon.
If you use the 16-20 count shrimp (16 to 20 shrimp per pound), it will take a whole slice of bacon per shrimp. Make sure you use regular cut bacon (not thick sliced). Partially cook it, to remove some of the fat, but don’t let it get crispy (drain on paper towels).


Wrap the partially cooked bacon around the raw shrimp. Starting at the wide end of the shrimp, attach the bacon to the shrimp with a toothpick. Wind the bacon around (in a single thickness) and all the way down to the tail and secure it with another

Baste the shrimp on both sides with your favorite barbeque sauce (I recommend Sweet Baby Ray’s barbeque sauce). Cover with plastic wrap and refrigerate for two hours.

Line a large baking sheet with foil (to help with cleanup) and put a baking rack on the foil (spray the rack with cooking spray). Place the shrimp on the rack and bake in a PREHEATED 450° oven for 10 minutes. After 10 minutes, TURN OFF THE OVEN (do not open the door) and let the shrimp sit in the hot oven for another five minutes. Remove the toothpicks and enjoy!

CHEESY FOCACCIA

CHEESY FOCACCIA - This is the easiest bread I have ever made. It is FULL of flavor and is soft and chewy with a delicious cheesy surface. Whether you use it to sop up a great sauce…or slice it for a sandwich, this recipe is a winner. The smell of it baking will bring your family running to the table.

CHEESY FOCACCIA


 INGREDIENTS CHEESY FOCACCIA 
  • 2 ¾ cups all purpose flour
  • 1 teaspoon salt
  • 1 teaspoon sugar
  • 1 tablespoon dry active yeast
  • 1 clove garlic minced
  • 1 teaspoon dried oregano
  • 1 teaspoon dried thyme
  • 1 teaspoon dried basil
  • ¼ teaspoon black pepper
  • 2 tablespoon olive oil (divided)
  • 1 cup warm milk
  • 1 tablespoon parmesan cheese
  • 1 cup mozzarella shredded
  • 1 teaspoon dried rosemary


Mix first 9 ingredients in the bowl of an electric mixer. Mix in warm milk and 1 tablespoon of olive oil. Mix well and knead until the dough is smooth and elastic (it will take just a couple minutes). Cover with plastic wrap and let this sit in a warm place for about 45 minutes. Punch down and place on a greased baking sheet. Pat dough out into a rectangle about ½” thick. Brush top with remaining 1 tablespoon olive oil and sprinkle with rosemary, mozzarella and parmesan cheeses. Cover loosely with plastic wrap and let this sit for about 30 minutes. With 2 fingers, make dents every few inches over surface of focaccia. Bake at 450° for 15 minutes or until golden. Remove to a rack.


This hearty bread also makes an excellent sandwich.

Make sure you pop over to Tried and True Cooking With Heidi
She is giving away a prize to celebrate her 100th post.

APPLE TART

APPLE TART There is nothing quite as American as apple pie, isn’t that the old adage? I started experimenting with apple pie recipes many years ago because it is one of my husbands favorites. This recipe is pretty easy, as pies go; it has a no-roll shortbread type crust and you pre-cook the apples so they bake quicker. I like this recipe because it makes a pretty presentation and it is baked in a two piece tart pan, so you can just life the tart out of the pan and set it on a pretty serving plate.


CRUST

  • 2 cups all purpose flour
  • 1 cup butter flavored Crisco
  • 1½ teaspoons white sugar
  • ½ teaspoon salt
  • ¼ cup ice water
  • 1 egg
  • 1½ teaspoons distilled white vinegar


With your electric stand mixer, mix the flour, Crisco, sugar and salt together. Add the ice water, vinegar and egg, beat just until smooth. Divide dough in half and pat one half into the two piece tart pan, pushing it up the sides, to the top of the pan, set in the fridge for a few minutes. Cover the other half of the dough while you do the apples.

APPLE FILLING
Peel and cube 5 granny smith apples. Boil them in some plain water for about 4 or 5 minutes until they just start to get tender, then drain well. To these apples, add:
½ cup of brown sugar
½ cup of white sugar
¼ cup of white flour
¾ teaspoon cinnamon
dash of salt
Stir gently until everything is wet, set aside.

Roll out the second half of the dough and cut into narrow strips. Put apple filling into tart crust and dot with 2 tablespoons of butter (tiny little dots). Lay the crust strips over the apples. Brush the strips with egg wash (1 egg beaten with a little water). Sprinkle strips with a light dusting of white sugar.

Bake in a pre-heated 375 oven for 40-45 minutes or until the crust strips are nice and golden. Let the pie cook to room temperature before you try to remove it from the two piece tart pan.

NOTE: You do not HAVE to pre-cook the apples, but if you do it this way, you will not get a soggy crust, or have any loose (watery) pie filling.
NOTE: If you do not want to do the whole roll out strips on top of the pie, just mix the following ingredients and sprinkle it on top of the apples and bake the same way.

APPLE CRISP TOPPING (ALTERNATIVE)
¾ cup brown sugar
½ cup all purpose flour
½ cup quick cooking oats
½ teaspoon cinnamon
½ teaspoon nutmeg (optional)
1/3 cup butter softened

OLD FASHIONED LEMON BARS

OLD FASHIONED LEMON BARSI tried (yet another) one of Laura's great recipes over at  heywhatsfordinnermom.com  (she has some great ones over there). 

This recipe, for Old Fashioned Lemon bars, couldn't be more basic, yet it hits all the right "lip smacking" notes and picky-picky husband loved them, so that makes this recipe 5 stars at our house!!


 The lemon bars have a sweet and buttery shortbread type crust that is partially baked before a gooey topping is added and baked again. The topping is sweet-ish, lemony-ish, pudding-y-ish (are those even real words?) the combo is heavenly.

BASE LAYER
1 cup flour
1/2 cup powdered sugar
1/2 cup COLD butter cubed

Put these three ingredients in the food processor and pulse until you get crumbs.  Pat the crumbs into an 8" x 8" baking dish. Bake in preheated 350° oven for 20 minutes.

While it is baking, whisk together the following topping ingredients until very smooth:

TOPPING LAYER
2 eggs
1 cup sugar
zest of one lemon (see note)
2  1/2  tablespoons lemon juice
2  1/2  tablespoons flour
1/2 teaspoon baking powder

After the cookie base ingredients have baked for 20 minutes, remove from the oven and pour over the topping ingredients and put it right back in the oven for another 25 minutes.

Cool completely in pan before cutting.  Sprinkle with a little powdered sugar (if you want).  Cut into small squares or bars since it is pretty rich.


STORE COVERED


NOTE: Be careful to only use the bright yellow part of the lemon zest. They pale yellow and while part of the lemon peel is very bitter.

NOTE: I lined my baking pan with parchment paper and left the ends/edges a little long. After the bars completely cool, I grab the edges of the paper and lift the whole thing out of the pan. I do this with all of my bar cookies because once they are out of the pan they are so much easier to cut.

NOTE:  If you aren't going to line your pan with parchment paper, I suggest you very lightly mist it with cooking spray.


FRUIT FILLED COOKIE BARS

 FRUIT FILLED COOKIE BARSI had a hard time coming up with a name for this delicious treat. It is not exactly a cake, but it's a little soft to be a cookie. It does remind me a little of one of those big soft cake-y sugar cookies, but don't forget it has a juicy fruit filling too, so what category does it really fall into?  Answer: Yummy Category!!


Usually, we just eat these out of hand, but they are also nice enough for company if you serve them with a scoop of ice cream!! Either way they are hard to beat with a tall glass of milk or a hot cup of tea.

1/2 cup butter (room temperature)
1 cup sugar
2 eggs
1 1/2 cups flour
1 teaspoon vanilla
14 ounce can fruit pie filling (see note)

Cream butter, sugar and vanilla together until very well mixed. Add the eggs, one at a time, beating well in between each egg.

Add flour and beat until well mixed, then let the dough sit for about 5 minutes.

Press 3/4 of the dough into a lightly greased 9" x 9" pan (I use a (9" springform pan).  Make the outside edge just a little deeper than the rest of the crust (this will help keep the fruit away from the edge of the pan).

Top with fruit filling (see note) and then drop little bits of the rest of the reserved dough on top of the fruit filling.

Bake in a pre-heated 375 oven for 35-40 minutes depending on how hot your oven runs. My electric oven takes 37 minutes.

Let cool for a while then drizzle with a vanilla frosting glaze.

Cool and store covered.  FRUIT FILLED COOKIE BARS


NOTES:

Any home made or commercial fruit filling will work well in the recipe, but I suggest that if you use a commercial pie filling, that you jazz it up a little. Example: if you are using cherry pie filling, add 1/4 teaspoon of almond extract, if you are using apple pie filling, chop them up a little and add a little more cinnamon and nutmeg or maybe a few raisin? Use your imagination.

You can double the ingredients and bake it in a 9" x 13" pan for 40-45 minutes.  Either way, use the toothpick test to make sure its done in the middle.